Showing posts with label chocolate. Show all posts

Tuesday, 27 May 2014

Maryland Cookie's and Cream Cake

Maryland cookies are by far the best packaged chocolate chip cookies you can find in the UK (even though they're not even made or sold in Maryland, or for that matter, the US), so why not make a cake out of them? If you haven't got buttermilk, you can just mix half plain natural yoghurt with half milk.


            Ingredients
For the Cake:
110g Unsalted Butter,Softened
380g Caster Sugar
320g Plain Flour
4tsp Baking Powder
1tsp Salt
320ml Buttermilk
3 Large Eggs
135g Maryland Cookies (or any other chocolate chip cookies)

For the Icing:
500g Icing Sugar, Sifted
160g Unsalted Butter, Softened
250g Mascarpone
3 Maryland/Chocolate Chip cookies, crumbled

Method
1. Preheat oven to 150C fan/170C/Gas 3, and line the bottom three 20cm (8inch) cake tins, and grease the sides. If you only have one, don't worry, it will just mean it will take longer, and you'll have more trips to the oven.

2. In a freestanding electric mixer or a handheld whisk, cream the butter and sugar until light and pale (it won't have the regular consistency of creamed butter and sugar as the ratio of butter to sugar is different). 

3. In a large jug, mix the buttermilk and the eggs. Very gradually, in a slow but steady stream, add about half of the jug while the mixture is being whisked, making sure it all stays well combined. Once half is added, sieve in the dry ingredients, and continue to mix on a slower speed. Then again, very gradually add the rest of the jug into the mix. 

4. Break the cookies into pieces by hand, no more than about 2cm in length, and fold into the batter. Divide into three cake tins, and place into the oven for 30-35 minutes, or until golden brown, springs back to the touch, and a skewer comes out clean. Once the cakes are cool to the touch, go around the edges of the cakes with a small palette knife to loosen it a bit, and remove from the tins, transferring them to a wire rack.

5. For the icing, use a free standing mixer or handheld whisk to cream the butter and sugar together until very light and pale, starting on a low speed so that icing sugar doesn't go everywhere. Add about a third of the mascarpone and beat until smooth, then add the rest, and mix for a few minutes on a high speed until much lighter in texture and colour. 

6. Once cakes are completely cool, you can start assembling. Take one cake, and add about 4 or 5 tablespoons of icing on top, smoothing out with a palette knife, and liberally sprinkling cookie crumbs on top. Top with the next cake and repeat. Add the last layer, and frost the top and sides of the cake, trying to ensure there are no gaps. Top with either leftover crumbs, broken up cookie pieces, or just leave plain. 

Enjoy :)


Tuesday, 14 January 2014

After Eight Mint Chocolate Cupcakes

Who doesn't like mint and chocolate? This recipe tries to copy the 'after eight' mint, with the dark chocolate cake, and the secret mint fondant filling inside. Not really sure what to say about quantity though, for me it made 24 mini muffins and 4 regular ones. 


Ingredients

For the Sponge
50g Dark Cooking Chocolate
123g Butter
113g Sugar
2 Eggs, Beaten
50g Self-Raising Flour
1.5 tbsp Cocoa Powder
Pinch of Salt

Mint Filling
100g Icing Sugar
3/4tsp Peppermint Extract
Some Water

Mint Buttercream
60g Butter, Soft
250g Icing Sugar
1/2tsp Peppermint Extract
1/2tsp Vanilla Extract
Some Milk
Green Food Colouring

A few thin mint chocolate crisps

Method

1. Preheat oven to 180C/fan 160C/Gas 4. Line/Grease a mini muffin or regular muffin tin. Put the chocolate and butter into a bain-marie and melt, stirring throughout. Remove from heat and stir in the sugar. Pour into a mixing bowl and leave to cool for 10 minutes. 

2. Beat the mix with a handheld or freestanding mixer for about 3 minutes, or until much lighter in colour, and gradually add the beaten eggs, beating well inbetween each addition for about 10 seconds. Sift in the dry ingredients and fold in until well incorporated. 

3. Fill the holes of the tins 3/4 of the way with mix, and place in the oven for about 25 minutes, or until a skewer comes out clean. They should have a brownie-like texture. In the oven they will rise, and then fall, so don't be alarmed if they do so. Place on a wire rack to cool. 

4. Whilst they are cooling, make the fondant filling. Mix the icing sugar, 1tbsp water and peppermint extract with a whisk until blended, then add about 1/2 tbsp more water and whisk until well incorporated. You are looking for a thick liquid texture. 

5. Once the cakes are fully cooled, using a knife, and not cutting too deep, cut a cylinder out of the top of a cupcake, and fill with fondant filling. Place the cylinder back in to the cupcake and set aside. Do the same for all.

6. For the icing, mix the sugar and soft butter together, then add the flavourings. Add 1 tbsp milk, and use a handheld whisk to bring it all together. Add another as much milk as necessary to form a quite thick icing, mixing inbetween additions, and add food colouring slowly to reach your desired colour. Pipe onto the cupcakes with a star nozzle. 

7. Cut the chocolate crisps into shards or rectangles, and stick on the top of the cake. 

Enjoy :)


Sunday, 20 October 2013

Banana Boston Cream Cake

A fantastic recipe; this chocolate covered banana cake is filled with homemade custard - and tastes amazing. A nice fruity, indulgent version of the traditional Boston Cream Pie. Takes a good few hours, but is definately worth it!


 Ingredients

For the Sponge
100g Unsalted Butter, Softened
150g Caster Sugar
2 Large Eggs, Beaten and at room temperature
2 Very Ripe Bananas, Mashed
125g Soured Cream
1tsp Vanilla Extract
300g Plain Flour
1/2tsp Salt
3/4tsp Baking Powder
1tsp Bicarbonate of Soda

For the Custard
250ml Whole Milk
1tsp Vanilla Extract
3 Egg Yolks
50g Caster Sugar
15g Plain Flour
15g Cornflour

For the Dark Chocolate Ganache
150g Good Quality Dark Cooking Chocolate, Chopped
150ml Whipping/Double Cream

To Decorate (Optional)
20g White Cooking Chocolate
20g Dark Cooking Chocolate
5g Margarine
1 Digestive Biscuit, Crushed

Method
1. Preheat the oven to 170C/150C fan/Gas 3, and line or grease two 20cm sandwich tins.

2. Using a free-standing mixer, cream the butter and sugar until it turns a cream colour. Slowly add a bit of the beaten eggs, mixing well after each addition.

3. In a jug, mix the mashed bananas, soured cream and vanilla, and then slowly add to the mixer on a low speed, making sure everything is incorporated. At this point it may curdle, but don't worry.

4. Sieve in all of the dry ingredients, and fold in with a spatula until even and smooth. Split between the two tins, and bake for about 25-35 minutes, or until a toothpick placed in the center of the cake comes out clean. Once baked, take them out of the tins after 10 minutes of cooling time, and then leave on a wire rack to cool fully.

5. Whilst the cakes are baking, prepare the custard. Heat the milk and vanilla extract in a saucepan and a medium-low heat until it boils. Meanwhile mix the yolks, sugar and flours to form a paste. Pour a bit of the warmed milk onto the paste and mix. Place paste into the saucepan, and put on a medium heat. Whisk for about 4-5 minutes, or until it properly thickens up and is smooth - but no longer or the eggs will scramble. Pour onto a baking tray and cover with cling film - this will stop a skin from forming. Leave to cool.

6. As the cakes are cooling, prepare the ganache. Do this by heating the cream in a saucepan until it's almost boiling and then pour on top of the chocolate, mixing until its all melted, and a smooth and glossy ganache is formed. Set aside to cool. 

7. Once the cakes are cool, using a hand mixer, whisk the custard until smooth. Then spread the custard on top of one of the cakes with a palette knife, and place the other cake on top. Wrap the sides tightly with cling film, and place in the fridge for 40 minutes so the custard sets.

8. Whilst the cake is setting, make the chocolate curls. Melt the two chocolates separately, the dark with 3g of margarine, and the white with 2g. Pour into a lined ramekin, and swirl with a toothpick. Place in the fridge until completely set, and then remove the block of chocolate, and (with cold hands) use a swivel bladed vegetable peeler to peel off curls. This step may take a few attempts, and a few times you might have to put the block in the fridge for a bit before carrying on. Place the finished curls in the fridge until needed. 

9. Once the cake has set, take off the cling film, and place on a wire rack with a plate underneath. Pour the ganache on top and smooth out with a palette knife around the sides. Leave for a while, and then before the ganache has completely set, place your biscuit crumbs and curls however you want.

Enjoy :)

Tuesday, 27 August 2013

Foolproof Chocolate Fondants


One of my favourite, rich recipes of all time, this mouth watering chocolate sauce-filled sponge dessert awesome. Make sure you use good quality chocolate. 
Makes 4. 

Ingredients

100g Dark Cooking Chocolate
120g Caster Sugar 
!00g Plain Flour, Sifted
100g Unsalted Butter
2 Eggs
2 Egg Yolks 
2tsp Tia Maria Liqueur (optional) 
Some Cocoa Powder
Strawberries and Ice Cream (To Serve)

Method
1. Grease 4 ramekins and dust with cocoa powder, spreading evenly and letting the excess fall into the next one. Heat the oven to 160C/140C fan. 

2. Melt the butter and the chocolate over a bain-marie, and leave to cool slightly

3. Whisk the eggs, yolks and the sugar until pale and thick, and then add the chocolate mixture. Fold in the flour and liqueur, and distribute between the 4 ramekins.

4. Bake for 12 minutes, or until the tops of all of them don't look glossy. Leave for 3 minutes. 

5. Carefully go around the outside of each fondant with a small palette knife - if you muck this up, it won't turn out properly. Carefully turn onto plates, and serve immediately. 

Enjoy :) 

Monday, 17 June 2013

Chocolate Milk Cupcakes

Exam season is over! Time for summer holidays! A recipe trying to imitate the refreshing cold chocolate drink, it's originally from the 'Lola's Cupcakes' recipe book, but with a few alterations. I decided to experiment with the decoration, instead of the chocolate sprinkles suggested by the recipe, I decided to do a range of toppings; cake crumbs, chocolate shards and chocolate leaves. It's up to you which one you choose, but each method is in the instructions. Makes 12 Muffins or 24 Mini Muffins.

 Ingredients

For the Cake
2 Eggs, Beaten
50g Dark Cooking Chocolate, Chopped
87g Butter
112g Caster Sugar
50g Self-Raising Flour
                      1 1/4 tbsp Cocoa Powder
A Pinch of Salt 

For the Vanilla Buttercream
60g Butter, Softened
250g Icing Sugar
1/2 tsp Vanilla Extract
2 tbsp Milk

For the Chocolate Leaves/Shards
50g Dark Cooking Chocolate 
Small, edible, non-toxic leaves with deep veins, such as bay leaves, mint leaves or rose leaves - Thoroughly Washed and Dried 

Method

1. Preheat the oven to 180C/Gas mark 4, and grease a 12 hole muffin tin, or a 24 hole mini muffin tin.

2. Melt the chocolate and the butter together in a bain-marie, remove from heat, and stir in the sugar. Let the mixture cool for about 10 minutes, and transfer into a mixing bowl.

3. Beat with an electric hand mixer for about 3 minutes, then gradually pour in the beaten eggs, mixing well between each addition. Sieve in the flour, cocoa and salt, and fold in with a metal spoon until incorporated. 

4. Pour the mixture into the tin, filling the holes up around just over 3/4 of the way, and bake in the oven for 20-25 minutes, or until well risen, and if a skewer is placed inside, it comes out clean. Leave for 10 minutes to cool, then with a small palette knife, gently ease the cupcakes out by going around the edges of the holes, and leave to cool on a wire rack. If you want to decorate your cakes with crumbs, scrape the residue left on the tin, and reserve for later.

5. While they're cooling, for the chocolate leaves, melt the chocolate in a bain-marie. With a pastry brush, or a small palette knife paint the underside of the leaves, and gently place on a sheet of greaseproof paper on a baking tray. Place in the fridge to set. Once completely set (around 20 minutes), gently peel the leaves away, and place the chocolate back onto the greaseproof paper, and chill until use.

6. Alternatively, for the chocolate shards, melt the chocolate in a bain-marie, and using a palette knife, quickly spread the chocolate onto a sheet of greaseproof paper into a layer around 2mm thick, and roll the sheet into a cylinder. Place the cylinder in the fridge until the chocolate is completely set (around 20 minutes), and remove from the fridge. Unroll the cylinder, and the chocolate should break into shards. Make them smaller if needed by breaking the pieces apart with your hands. Chill until use.

7. For the Buttercream, beat the butter in a mixing bowl until very smooth and creamy, and then sieve in half of the icing sugar. Using a spoon first, slowly mix the butter and sugar together, and then once most is incorporated, use a hand whisk. Repeat for the rest of the icing sugar, and then add the milk and vanilla extract. 

8. Once the cupcakes are completely cool, using either a piping bag fitted with a star nozzle, or a palette knife, apply the icing to the cupcake. Add your desired decoration - be very gentle with the leaves as they are extremely delicate. 

Enjoy :)


Monday, 10 June 2013

The Ultimate Banoffee Pie

For this one, I only have one person to thank; Ruth Davis, for providing me with the base recipe for this incredible dessert. Incredibly simple and no-bake, this rich and crumbly dessert will please anyone!
 
 Ingredients

For the Biscuit Base
250g Chocolate Digestives
85g Butter

For the Filling
3 or 4 Bananas
397g Can of Caramel Condensed Milk
300ml Double/Whipping Cream
Caster Sugar, to Taste

For the Dark Chocolate Curls
50g Dark Cooking Chocolate
2tsp Butter

Method
1. For the chocolate curls, line a ramekin and place in the freezer while melting the chocolate and the butter together in a bain-marie. Pour melted mix into the ramekin, and place in the fridge for about 1 hour, or until you're sure it's completely set.

2. Meanwhile, place the biscuits in a plastic bag and close it. Use a rolling pin to bash them into fine crumbs, or alternatively, place the biscuits in a food processor and whizz until fine crumbs. Place crumbs into a bowl. 

3. Melt the butter (for the biscuit base) in a small saucepan, and pour into the the biscuit crumbs, and mix. Pour mix into a 23cm loose bottom flan tin, and using the back of a spoon, spread evenly along the bottom and sides, compacting it to create a pie shell. 

4. Chop up the bananas into slices, and line the pie shell evenly with them. Pour the condensed milk on top, and spread evenly with a palette knife. Place pie in the fridge.

5. Pour the cream into a large mixing bowl, and add a few spoons of sugar. Taste it, and if not sweet enough, add more. Using a hand whisk, beat it until thick, and holds a solid trail. Place in the fridge.

6. Take the ramekin out of the fridge, and carefully remove your chocolate block. [Wash your hands with cold water to ensure your body heat doesn't melt the chocolate while doing the next part] Using a swivel-edged peeler along the edge of the block, peel curls out of the block and place into a bowl. Place in the fridge.

7. Remove pie from the fridge, and fill a piping bag with a 1.5cm plain nozzle with the cream. Pipe lines across like I did, or any other design you want onto the pie. Take the curls out of the fridge, and place them all in the middle, or in lines onto your cream, and break up the excess ones and sprinkle them on top, or use them to fill in the gaps where the condensed milk is showing.

8. Place pie in the fridge until it's time to serve. If you want, you can take it out of the tin, but if you do, be extremely careful, as the biscuit base is incredibly delicate (thats why I say to use a loose bottomed tin).

Enjoy :)

Monday, 11 February 2013

Chocolate and Almond Cake Pops

A product of hours of testing, experimental bakes and developments, these cake pops were the subject of my GCSE coursework final practical, the theme of which was winter. Again, these need to be made with a cake pop mould, which are easily available on the internet. But beware - they are not for beginners, and be sure to lay down some newspaper before making the spun sugar.


Ingredients

For the Sponge
125g Butter, Softened
125g Caster Sugar
125 Self-Raising Flour
2 Eggs, Beaten
2tsp Cocoa Powder
1/2tsp Almond Essence
12g Ground Almonds

For the White Chocolate Ganache
175g White Cooking Chocolate, broken up into small pieces
175ml Whipping Cream

For the Spun Sugar
3g Liquid Glucose
Pinch Cream of Tartar
33g Caster Sugar
15ml Water

25g Dark Cooking Chocolate
12 Wooden Skewers
Cake Pop Mould
Polystyrene Block

Method
1. Preheat oven to 160C/180C fan/Gas mark 3. Grease the mould well. Cream the butter and sugar together until a very light off-white (this will take at least 10 minutes), and very slowly add the eggs, beating well after each addition. Sift and fold in the flour with a metal spoon.

2. Divide the mixture in half, and in one add the cocoa powder, and to the other add the almond essence and ground almonds. Fill up one half of the mould; half with each mix, and marble with a cocktail stick. Place in the oven for about 10-15 minutes, or until a cocktail stick comes out clean when placed through the hole at the top.

3. While the cakes are cooking, heat the cream until bubbling, and pour on top of the chocolate in a heatproof bowl, and mix until all the chocolate has melted. Whisk with for a few minutes and then place in the fridge. Leave the cakes to cool on a wire rack before taking them out of the mould. 

4. Once the cakes have cooled, melt the dark chocolate, and coat the tip of a wooden skewer. Carefully push it through one of the balls about halfway, making sure a small amount of chocolate leaks out. This will be the glue for the skewer. Place in a dish with an edge, such as a cake tin (image above), and repeat for all the cake pops. Place in the fridge until the chocolate is completely set. 

5. Take the ganache out of the fridge, and whisk until its a thick liquid. Try dipping a cake pop into it, and if it easily enrobes the cake without being translucent or too stiff, its the right consistency. To loosen it, put it in the microwave for a few seconds. Dip each pop by the skewer into the ganache, letting any excess drip off, and push the bottom part of the skewer into a polystyrene block. Leave to set completely.

6. Lay out over the edge of your work surface three metal handles. To make the spun sugar, place all ingredients into a saucepan. Place the pan on a low heat, and stir continuously until all the sugar has dissolved. Using a pastry brush dipped in water, make sure all the sugar near the surface of the liquid stuck to the side of the saucepan is brushed away, or into the liquid to prevent recrystallisation. Turn up the heat slightly, so it gently bubbles. Heat until you see the very slightest change in colour to a slight caramel colour, and dip quickly the base of the saucepan in a bowl of water to stop it cooking. Using give it a second or two to thicken slightly, and using two forks back to back, dip them in, and flick them back and forth across the handles, to create thin, hair-like strands. Collect a few straight after you created them, and bend them with your hands into a slightly more circular shape, and place on top of a cake pop. If the liquid sets, place on a low heat, and wait for it to loosen again.

Enjoy :)

Saturday, 3 November 2012

Marbled Cake Pops

A recipe I am planning to make in school and wanted to try out at home, these cake pops are so good, but you do need the cake pop tin. The actual cake is very simple, and this is really not too hard to make - you just need time.


Ingredients

The Cake
125g Self-Raising Flour
125g Soft Unsalted Butter
125g Caster Sugar
2 Eggs
1/2 tsp Vanilla Extract
2tsp Cocoa Powder

The Finish
200g Dark/Milk COOKING chocolate
100g White Chocolate
Ground Almonds or Dessicated Coconut

Wooden Skewers/Cake Pop Sticks

Method
1. Grease the mould and preheat oven to 190C/170C fan/gas 5.

2. Cream the butter and sugar until very light and fluffy, then beat the eggs together in a jug, and gradually pour them in, beating well after each addition.

3. Fold in the flour, and then put half the mix in a separate bowl, and add the cocoa powder to one of them.

4. Place a bit of both of the mixes in each pod, and then marble with a toothpick. Make sure it only reaches a small dome above the lip of each pod. Place in the oven for about 15, but place a cake tester in the hole before taking them out.

5. While the cakes are cooling, melt the dark/milk chocolate in a heatproof bowl over a pan of simmering water, and pour into a ramekin.

6. Once the cakes have cooled, pop them out. Dip one end of the skewer about 1cm into the chocolate, and then push into one side of the cake about 3/4 of the way, and place on a sheet of greaseproof paper, stick up.


7. To stop the chocolate in the ramekin from hardening, place the ramekin into a larger bowl with hot water. Once the chocolate around the sticks have hardened and the sticks are held in place, dip each pop into the chocolate in the ramekin until its completely enrobed in chocolate, letting excess drip back into the ramekin. Place one end of the skewer into a colander, as in the picture to let the chocolate harden.

8. Once all the dark/milk chocolate has hardened, melt the white chocolate like the dark/milk and while turning the skewer of a cake pop, pick up a small amount of white chocolate on a teaspoon, and let it drip onto the cake pop, creating swirls.

9. Before you return the pops to the colander, sprinkle with a some ground almonds or dessicated coconut so it sticks to the white chocolate, and shake off the excess. Return to the colander and leave to set. 


Saturday, 22 September 2012

Vanilla and Double Chocolate Chess Cake


Originally from 'The Great British Bake Off: How to turn everyday bakes into showstoppers' by Linda Collister, this cake is a great twist to the marble cake. Originally three layers, I compressed it down to two, and it was still quite tall. It is essential though, that you have two relatively large piping bags with 1.5cm tubes, otherwise you will not get the chessboard effect.


Ingredients

The Sponge
233g Butter,Softened
233g Caster Sugar
233g Self-Raising Flour
40ml Milk
                             33g Cocoa Powder
4 Large Eggs, Beaten
2/3 tsp Vanilla Extract
Pinch of Salt

White Chocolate Ganache
87g White Chocolate, finely chopped
63ml Whipping Cream
25g Unsalted Butter

Dark Chocolate Ganache
150g Dark Chocolate (70% Cocoa Solids), finely chopped
150ml Whipping Cream

To Finish
A slab of white chocolate (not much will be used)
Boozy Chocolate Truffles (click link for recipe)

Method
1. Preheat oven to 180C/Fan 160C/Gas 4. Grease 2 x 20.5 sandwich tins, and line the bases with baking paper. Put the butter into a large mixing bowl, and beat with a free standing mixer until very creamy. Gradually beat in the sugar, then the vanilla. Keep beating (scrape down the sides of the bowl from time to time) until the mixture is very pale and fluffy in texture.

2. Gradually add the eggs, a tablespoon at a time, beating well after each addition. Add 1 tablespoon of the flour with each of the last 2 portions of egg to prevent curdling.

3. Sift the remaining flour and the salt into the bowl, and gently fold in using a large metal spoon until thoroughly combined. Transfer half of the mixture into another large bowl.

4. Sift the cocoa into one bowl, and add half of the milk; fold in until completely blended. Fold the rest of the milk into the second bowl of mix. Fit two piping bags with 1.5cm plain tubes, and place each in two large glasses, folding the top of the piping bags over the rim of the glasses.

5. Fill the piping bags 2/3 of the way up, one with the vanilla mix, and one with the chocolate mix. Take one sandwich tin, and pipe a chocolate ring around the inside edge. Then pipe a vanilla ring inside the chocolate ring. Repeat with alternate piping bags until the tin is filled. In the next tin, start with the vanilla mix on the inside edge, and again, alternate piping bags until the tin is full. Make sure all of the rings are even the whole way round before baking.

6. Bake for 22-25 minutes, or until browned/ a skewer will come out clean. Run a knife around the inside of each tin, and turn out onto a wire rack and leave to cool completely before icing.

7. For either/both ganaches, put the chocolate (and butter for the white chocolate ganache)into a heatproof bowl. Heat up the corresponding quantity of cream until right before it starts boiling, and pour over the chocolate. Slowly stir with a spoon until all the chocolate has melted, and leave in the fridge to set.

8. Once the ganaches have become much thicker, but still spreadable and glossy, take them out of the fridge and evenly spread one cake, browned side uppermost, with the white chocolate ganache, and place the other cake on top. Wipe away any trickling ganache. Next, cover the top and sides of the cake with the dark chocolate ganache, scooping away any excess. If the ganache has set too much that you cant spread it properly, hold a palette knife under hot water, dry, and then use to spread the ganache. Leave to set.

9. Take the block of white chocolate, and scrape a large knife across it, to create a bunch curls or shavings. Then take a small round cookie cutter and place in the middle of your cake. Place the chocolate curls in the ring, and lift the ring away, letting the curls cascade down. Place the truffles around the edges, and you are finished! Consume within 4 days.


Simple Boozy Chocolate Truffles

Perfect as decorations for cakes, gifts, or an indulgent dessert, these are great! For a non-adult version, remove the Cognac (they still taste as good). Can be quite tricky to get the ganache right, but the rest is simple. Makes approx. 18 (depends on how big you want them)


Ingredients

100g Dark Chocolate (70% Cocoa Solids Minimum)
100ml Whipping Cream
2tbsp Cognac
Cocoa Powder

Method
1. Make sure the chocolate is at room temperature, then chop the chocolate into very small pieces, and place into a heatproof bowl.

2. Heat up the cream in a saucepan right its about to boil, and pour over the chocolate. Stir a little (but not too much, or it will separate) until the chocolate is completely melted. Be patient with this, as it might take a while (if the mix goes cold and the chocolate still hasn't melted, pour a few centimeters of very hot water into a larger heatproof bowl, and place the smaller one inside for a bit).

3. Stir in the cognac, and place the bowl in the fridge. Leave to set until the consistency resembles a thick chocolate mousse.

4. Cover a large chopping board with a thin layer of cocoa powder, and take a small scoop of the chocolate mix, and roll into a ball in your hands. Next, roll it in the cocoa powder until completely covered, then place on a dish

5. Repeat until all the mix is used up. Store in the fridge and enjoy :)

Monday, 3 September 2012

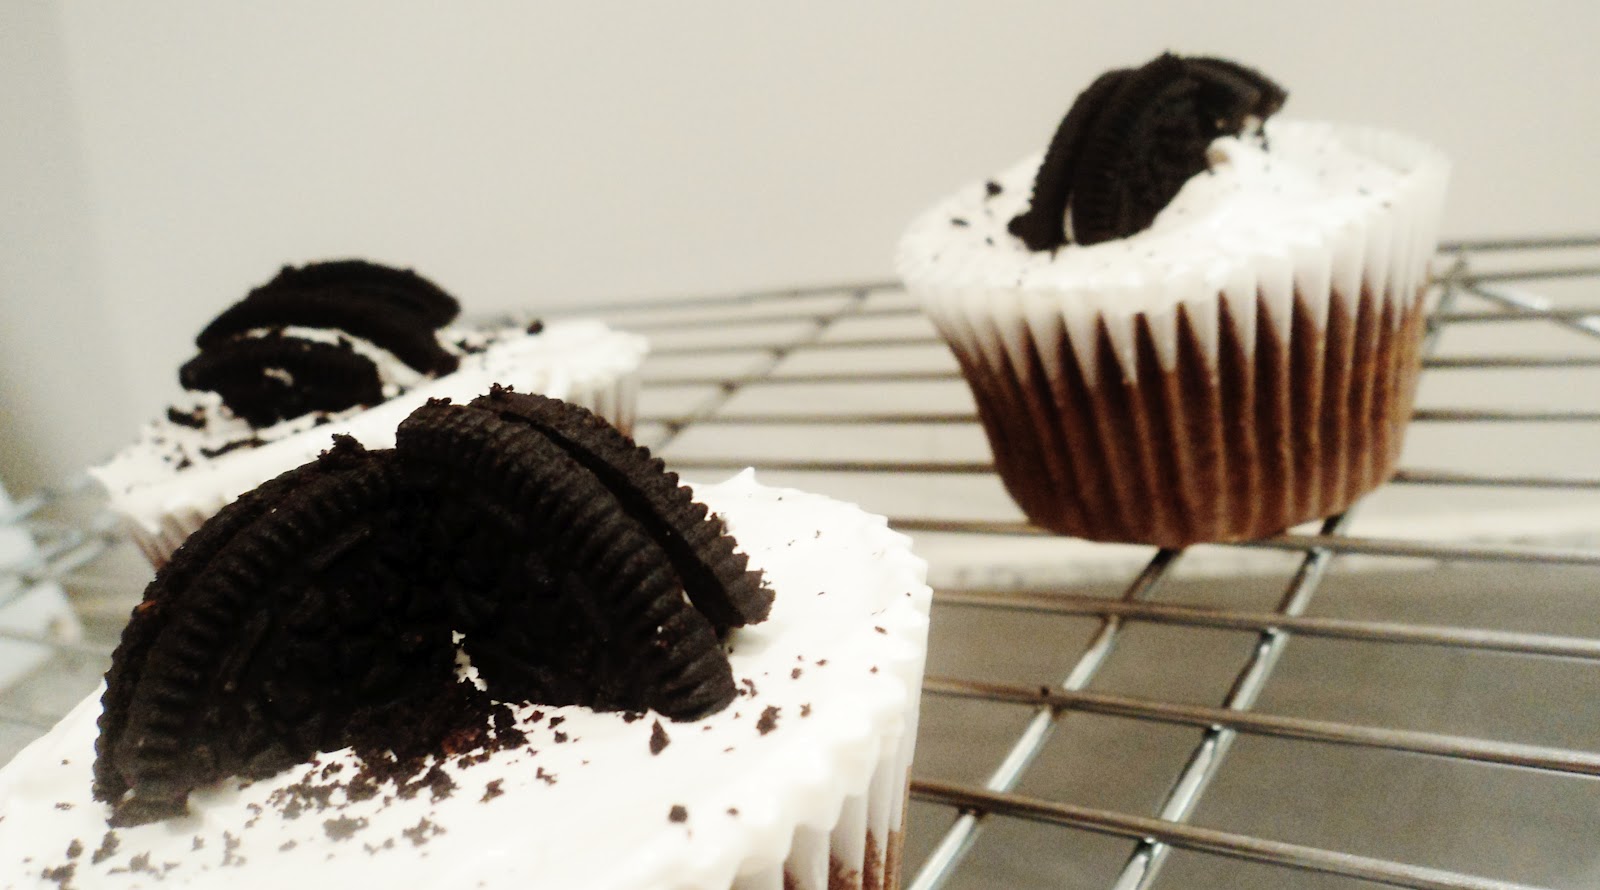
Cookies 'n' Cream Muffins with Homemade Marshmallow Fluff Icing

I don't think I have met one person who doesn't like oreos; so this recipe will suit everyone! Minus my tweaks, the original recipe was from the 'Primrose Bakery', and is the best cookies n cream cupcake/muffin recipe I have found yet, and it works great with the marshmallow fluff icing! It makes around 18 muffins(use a muffin tin, not a cupcake tin). The Marshmallow Fluff recipe makes a lot, so once you've finished icing, store the remaining fluff in the fridge to eat with toast, or use in cakes, drinks etc.                                                             


Ingredients


Cupcake Mix (the 'Cookie')
115g Dark Chocolate
85g Butter
175g Light Muscavado Sugar
2 Eggs (separated)
185g Plain Flour
3/4tsp Baking Powder
3/4tsp Bicarbonate of Soda
Pinch of Salt
250ml Semi-Skimmed Milk
1tsp Vanilla Extract

Marshmallow Fluff Icing(the 'Cream')
120g Granulated Sugar
80g Golden Syrup
1.5tbsp Water
2 Egg Whites
1/2tsp Vanilla Extract

1 Pack of Oreos 

Method
1. Preheat oven to 190C/fan 170C/gas mark 5. Line a 2 12 hole muffin tins with about 18 muffin cases (if you only have one tin, you can bake them in batches).

2. Melt the chocolate in a heatproof bowl over simmering water, or in the microwave. Leave to cool for about 2 minutes.

3. Cream the butter and sugar in a stand mixer until pale and smooth, then slowly add the egg yolks bit by bit and beat well. Once combined, add the melted chocolate and beat well again.

4. Sift the flour, baking powder, bicarbonate of soda and salt into a medium mixing bowl and mix together until combined. Measure the milk into a jug and stir in the vanilla extract.

5. Gradually add alternate amounts of the dry floury mix and the milk mix into the creamed butter/sugar/chocolate mix, beating well between each addition.

6. In a clean bowl, using a handheld electric whisk, whisk the egg whites until stiff peaks have formed. Then, using a spatula or a metal spoon, fold in the egg whites into the batter until thoroughly combined.

7. Using two spoons, spoon the batter into the cases, filling them about 2/3 of the way up, and bake for around 20 minutes (you'll know if you put the right amount of mix in if it's ready in exactly 20 minutes), or until when you stick a skewer in one, it comes out clean. If you don't have two muffin tins like me, cooking in batches might take a while, so start on the icing once the first batch is done.

8. For the marshmallow fluff icing, put the sugar, golden syrup and water into a pan, and cook on a high heat for about two minutes until the mixture thickens and turns golden (it will resemble caramel).

9. Whisk the egg whites until soft peaks form, then keep beating while slowly adding the hot sugar mixture. Don't worry if your whites lose their stiffness.

10. Continue beating at a higher speed until the mixture becomes thick, glossy and cool. Towards the end, add the vanilla extract. 

11. Wait about 10 minutes for the muffins to cool a bit before adding the icing, then spoon on a small dollop onto each muffin, and smoothen out with a small palette knife, or a round-ended knife.

12. Chop your oreos into quarters, and save the crumbs. Place two quarters on each cake, and sprinkle the remaining crumbs around them. 

And as always, enjoy! :)