Showing posts with label cookies. Show all posts

Tuesday, 27 May 2014

Maryland Cookie's and Cream Cake

Maryland cookies are by far the best packaged chocolate chip cookies you can find in the UK (even though they're not even made or sold in Maryland, or for that matter, the US), so why not make a cake out of them? If you haven't got buttermilk, you can just mix half plain natural yoghurt with half milk.


            Ingredients
For the Cake:
110g Unsalted Butter,Softened
380g Caster Sugar
320g Plain Flour
4tsp Baking Powder
1tsp Salt
320ml Buttermilk
3 Large Eggs
135g Maryland Cookies (or any other chocolate chip cookies)

For the Icing:
500g Icing Sugar, Sifted
160g Unsalted Butter, Softened
250g Mascarpone
3 Maryland/Chocolate Chip cookies, crumbled

Method
1. Preheat oven to 150C fan/170C/Gas 3, and line the bottom three 20cm (8inch) cake tins, and grease the sides. If you only have one, don't worry, it will just mean it will take longer, and you'll have more trips to the oven.

2. In a freestanding electric mixer or a handheld whisk, cream the butter and sugar until light and pale (it won't have the regular consistency of creamed butter and sugar as the ratio of butter to sugar is different). 

3. In a large jug, mix the buttermilk and the eggs. Very gradually, in a slow but steady stream, add about half of the jug while the mixture is being whisked, making sure it all stays well combined. Once half is added, sieve in the dry ingredients, and continue to mix on a slower speed. Then again, very gradually add the rest of the jug into the mix. 

4. Break the cookies into pieces by hand, no more than about 2cm in length, and fold into the batter. Divide into three cake tins, and place into the oven for 30-35 minutes, or until golden brown, springs back to the touch, and a skewer comes out clean. Once the cakes are cool to the touch, go around the edges of the cakes with a small palette knife to loosen it a bit, and remove from the tins, transferring them to a wire rack.

5. For the icing, use a free standing mixer or handheld whisk to cream the butter and sugar together until very light and pale, starting on a low speed so that icing sugar doesn't go everywhere. Add about a third of the mascarpone and beat until smooth, then add the rest, and mix for a few minutes on a high speed until much lighter in texture and colour. 

6. Once cakes are completely cool, you can start assembling. Take one cake, and add about 4 or 5 tablespoons of icing on top, smoothing out with a palette knife, and liberally sprinkling cookie crumbs on top. Top with the next cake and repeat. Add the last layer, and frost the top and sides of the cake, trying to ensure there are no gaps. Top with either leftover crumbs, broken up cookie pieces, or just leave plain. 

Enjoy :)


Monday, 10 June 2013

The Ultimate Banoffee Pie

For this one, I only have one person to thank; Ruth Davis, for providing me with the base recipe for this incredible dessert. Incredibly simple and no-bake, this rich and crumbly dessert will please anyone!
 
 Ingredients

For the Biscuit Base
250g Chocolate Digestives
85g Butter

For the Filling
3 or 4 Bananas
397g Can of Caramel Condensed Milk
300ml Double/Whipping Cream
Caster Sugar, to Taste

For the Dark Chocolate Curls
50g Dark Cooking Chocolate
2tsp Butter

Method
1. For the chocolate curls, line a ramekin and place in the freezer while melting the chocolate and the butter together in a bain-marie. Pour melted mix into the ramekin, and place in the fridge for about 1 hour, or until you're sure it's completely set.

2. Meanwhile, place the biscuits in a plastic bag and close it. Use a rolling pin to bash them into fine crumbs, or alternatively, place the biscuits in a food processor and whizz until fine crumbs. Place crumbs into a bowl. 

3. Melt the butter (for the biscuit base) in a small saucepan, and pour into the the biscuit crumbs, and mix. Pour mix into a 23cm loose bottom flan tin, and using the back of a spoon, spread evenly along the bottom and sides, compacting it to create a pie shell. 

4. Chop up the bananas into slices, and line the pie shell evenly with them. Pour the condensed milk on top, and spread evenly with a palette knife. Place pie in the fridge.

5. Pour the cream into a large mixing bowl, and add a few spoons of sugar. Taste it, and if not sweet enough, add more. Using a hand whisk, beat it until thick, and holds a solid trail. Place in the fridge.

6. Take the ramekin out of the fridge, and carefully remove your chocolate block. [Wash your hands with cold water to ensure your body heat doesn't melt the chocolate while doing the next part] Using a swivel-edged peeler along the edge of the block, peel curls out of the block and place into a bowl. Place in the fridge.

7. Remove pie from the fridge, and fill a piping bag with a 1.5cm plain nozzle with the cream. Pipe lines across like I did, or any other design you want onto the pie. Take the curls out of the fridge, and place them all in the middle, or in lines onto your cream, and break up the excess ones and sprinkle them on top, or use them to fill in the gaps where the condensed milk is showing.

8. Place pie in the fridge until it's time to serve. If you want, you can take it out of the tin, but if you do, be extremely careful, as the biscuit base is incredibly delicate (thats why I say to use a loose bottomed tin).

Enjoy :)

Sunday, 5 May 2013

Spicy Gingerbread Custard Creams

It's coming to the end of my academic year, and I wanted to make something for my teachers as a sort of 'thank you'. Inspired by an idea of lots of spice going into gingerbread, I thought - how about spicy gingerbread? It turned out very well, and I embossed the tops with a special tool used to emboss letters. Makes about 30 sandwich biscuits. 

Ingredients

For the Biscuits 
113g Softened Butter
75g Granulated Sugar
165g Dark Brown Muscavado Sugar
1/4tsp Bicarbonate of Soda
1/2tsp Salt
3tsp Ground Cinnamon
3/4tsp Ground Nutmeg
1/2tsp Ground Ginger
1/4tsp Ground White Pepper
1/4tsp Ground Black Pepper
1 1/2tsp Vanilla Extract 
235g Plain Flour
1 Egg, Beaten
Chilli Powder

For the Filling
25g Softened Butter
1.5tbsp Instead Custard Powder
100g Icing Sugar, sieved
1/2tsp Vanilla Extract 
2tsp Milk

Method 
1. Cream the butter and sugars until light and fluffy. Add all the other dry ingredients except the flour, and mix until properly incorporated.

2. Slowly add the beaten egg, mixing between each addition, then add the flour, and fold in. Collect up all the dough and wrap in cling film. Refrigerate for 20 mins. Preheat oven to 190C/fan 170C.

3. Take a lump of dough, and roll out on a floured surface to about 1/2cm in thickness and using a cookie cutter, cut out cookies, and using a palette knife, transfer onto a lined baking tray. Rub a little chilli powder into each biscuit, and place batch in the oven for 9-10 mins. In the meantime, roll out and cut another batch. Once cooked, leave for 2 mins, then place on a wire rack. They will be soft and will harden when cool, so be careful.

4. To make the filling, cream the butter until light, and slowly add the custard powder and sugar. Add the vanilla and mix until well combined. Add more milk/icing sugar until you achieve a thick paste texture. Spread a dollop on one, leaving a bit on the edges without, and place another on top, wiggling it to spread the filling around the entire biscuit. 

Enjoy :)


Saturday, 8 December 2012

Jammie Dodgers: My Take

'If it 'aint broke, don't fix it' - Bert Lance. I decided to take on the challenge of making a variation to jammie dodgers, and it actually worked quite well. Essentially I have made a brown sugar shortbread biscuit with reduced strawberry jam in the middle and a lemon icing on top. This recipe made about 32 biscuit sandwiches for me as I experimented with quantities of ingredients, so get ready for multiple trips to the oven!


 Ingredients

For the Biscuits:
225g Unsalted Butter, Softened
100g Brown Sugar
100g Caster Sugar
412g Plain Flour
1 Egg, Beaten
2tsp Baking Powder
2tbsp Milk
1/2tsp Vanilla Extract
Pinch of Salt

For the Jam Filling:
340g Strawberry/Raspberry Jam
Few Drops of Lemon Juice

For the Lemon Icing:
150g Icing Sugar, sieved
1tsp Lemon Juice

Method
1. Beat the butter until creamy and fluffy, then add both of the sugars gradually. Mix until very light in colour and texture. Gradually add the egg, beating well after each addition.

2. In a separate bowl, combine the flour, baking powder, and salt, and add to the butter mix gradually, alternating with the milk, mixing at a low speed between each addition. Add vanilla extract. 

3. Divide dough into to two portions, wrap in cling film and chill for 20 mins. 

4. Preheat oven to 180C/fan 160C and line a few baking trays with greaseproof paper. Roll out the dough on a lightly floured surface to about 1/8 of an inch thickness. Using a 2 inch cookie cutter, cut out as many rounds as possible, and reroll and cut the remaining pastry until as much as possible is used up. In half of your biscuits, either using an apple corer, or a smaller cutter, cut out a hole in the middle.

5. Place biscuits onto baking trays and bake for about 10 mins or until slightly browned. When they come out the oven they will be soft, but they will harden. Cool on a wire rack.

6. To prepare the jam: pass all of the jam through a sieve to remove lumps and seeds. Then place into a saucepan with a few drops of lemon juice, and heat on a medium-low heat until steaming, then let it simmer on a lower heat for 2 mins. Chill in the fridge while preparing the icing.

7. To prepare the icing: Mix the icing sugar and lemon juice to form a loose paste - add more icing sugar/lemon juice if necessary. Put the icing into a piping bag with a small plain nozzle. Place all of the cooled biscuits with the hole in the middle on a sheet of greaseproof paper bunched together, and pipe long lines across all of them. Leave to set.

8. Take the jam out of the fridge and lightly spread the biscuits without the hole with a palette knife. Once the icing has set on the tops, place them on top, giving it a light push, so some of the jam will move to the hole in the middle. Add a drop of jam into the hole of each biscuit. 

9. Leave the biscuits in the fridge for the jam to firm up, and they will be ready. Enjoy :)


Monday, 3 September 2012

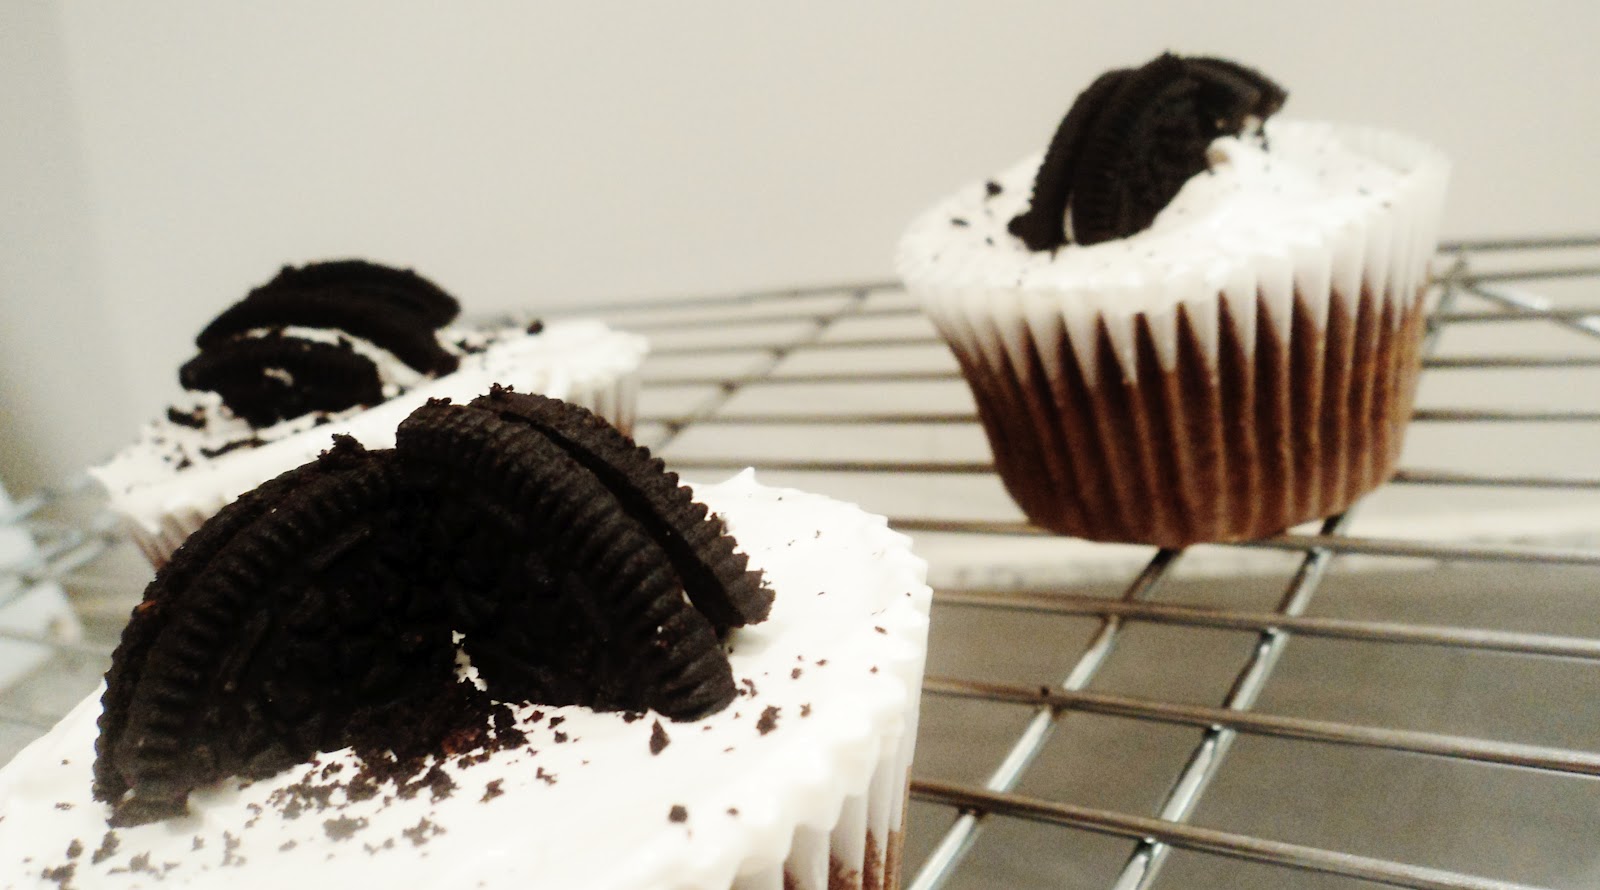
Cookies 'n' Cream Muffins with Homemade Marshmallow Fluff Icing

I don't think I have met one person who doesn't like oreos; so this recipe will suit everyone! Minus my tweaks, the original recipe was from the 'Primrose Bakery', and is the best cookies n cream cupcake/muffin recipe I have found yet, and it works great with the marshmallow fluff icing! It makes around 18 muffins(use a muffin tin, not a cupcake tin). The Marshmallow Fluff recipe makes a lot, so once you've finished icing, store the remaining fluff in the fridge to eat with toast, or use in cakes, drinks etc.                                                             


Ingredients


Cupcake Mix (the 'Cookie')
115g Dark Chocolate
85g Butter
175g Light Muscavado Sugar
2 Eggs (separated)
185g Plain Flour
3/4tsp Baking Powder
3/4tsp Bicarbonate of Soda
Pinch of Salt
250ml Semi-Skimmed Milk
1tsp Vanilla Extract

Marshmallow Fluff Icing(the 'Cream')
120g Granulated Sugar
80g Golden Syrup
1.5tbsp Water
2 Egg Whites
1/2tsp Vanilla Extract

1 Pack of Oreos 

Method
1. Preheat oven to 190C/fan 170C/gas mark 5. Line a 2 12 hole muffin tins with about 18 muffin cases (if you only have one tin, you can bake them in batches).

2. Melt the chocolate in a heatproof bowl over simmering water, or in the microwave. Leave to cool for about 2 minutes.

3. Cream the butter and sugar in a stand mixer until pale and smooth, then slowly add the egg yolks bit by bit and beat well. Once combined, add the melted chocolate and beat well again.

4. Sift the flour, baking powder, bicarbonate of soda and salt into a medium mixing bowl and mix together until combined. Measure the milk into a jug and stir in the vanilla extract.

5. Gradually add alternate amounts of the dry floury mix and the milk mix into the creamed butter/sugar/chocolate mix, beating well between each addition.

6. In a clean bowl, using a handheld electric whisk, whisk the egg whites until stiff peaks have formed. Then, using a spatula or a metal spoon, fold in the egg whites into the batter until thoroughly combined.

7. Using two spoons, spoon the batter into the cases, filling them about 2/3 of the way up, and bake for around 20 minutes (you'll know if you put the right amount of mix in if it's ready in exactly 20 minutes), or until when you stick a skewer in one, it comes out clean. If you don't have two muffin tins like me, cooking in batches might take a while, so start on the icing once the first batch is done.

8. For the marshmallow fluff icing, put the sugar, golden syrup and water into a pan, and cook on a high heat for about two minutes until the mixture thickens and turns golden (it will resemble caramel).

9. Whisk the egg whites until soft peaks form, then keep beating while slowly adding the hot sugar mixture. Don't worry if your whites lose their stiffness.

10. Continue beating at a higher speed until the mixture becomes thick, glossy and cool. Towards the end, add the vanilla extract. 

11. Wait about 10 minutes for the muffins to cool a bit before adding the icing, then spoon on a small dollop onto each muffin, and smoothen out with a small palette knife, or a round-ended knife.

12. Chop your oreos into quarters, and save the crumbs. Place two quarters on each cake, and sprinkle the remaining crumbs around them. 

And as always, enjoy! :)